The Paleolithic diet. The diet of the caveman. In a time when people formed small societies, gathered plants, fished, and hunted wild animals-- all for the means of survival. How can this mean anything to the modern human, sheltered behind a locked door and armed with Postmates and Amazon Prime NOW?
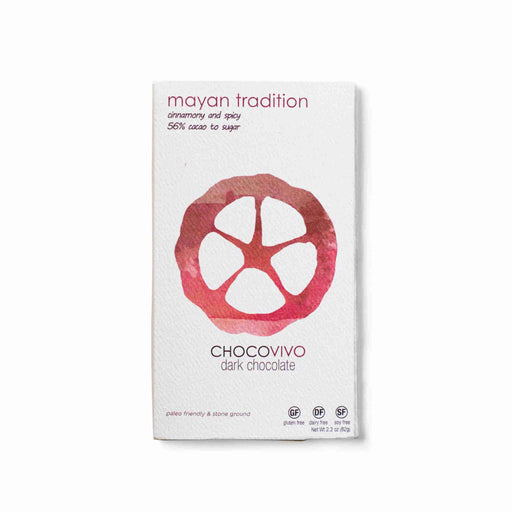
In this day and age, it is actually easy to see why this diet amassed such a following. Paleo is a direct response to all that is wrong with what we eat today. A genetically modified, sucrose-ladden, gluten infested, chemically fortified, smorgasbord drizzled with red 40, yellow 5, and blue 1-colored high fructose corn syrup. Sadly we have processed our foods into forms not readily recognizable by our bodies. The Paleo diet avoids processed foods, dairy products, grains, sugar, legumes, processed oils, salt, alcohol, and dare I say, coffee. What you are left with is vegetables, fruits, nuts, roots, and meat. The science behind the benefits of raising our standard of food back to that of the stone-age is as considerable as it is ironic. The mission of ChocoVivo is to avoid ‘processed’ and ‘processing’ wherever and whenever possible -- to bring the idea of chocolate back to the glorious, nutrient-dense superfood it was once considered in the time of Mayan and Aztec societies over two thousand years ago. And so the birth of ChocoVivo Paleo blends.
Although all of ChocoVivo chocolate is stone ground with a tool similar to a mortar and pestle, we take care not to over-process or refine our sustainably-grown and minimally fermented chocolate. There issugar in some of our blends, but that consists only of unrefined cane sugar.
Our ideas regarding how and what we should eat are as diverse as we are as a society, but when it comes to food, one idea seems to override all: ‘simple is better.’
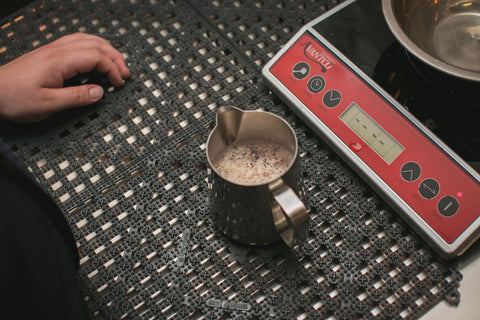
Prep Time
15 mins
|
Total Time
15 mins
|
Recipe Yield
16 Balls
|
Category: Snack
Cuisine: Paleo
Keyword: Keto Balls
|
Ingredients:
|
Instructions:
|
*Use 1 cup raw almonds and ½ cup macadamia nuts, but you can use any combination of your favorite nuts.
**Use sunflower seed butter. To keep these paleo, avoid using peanut butter ***Use 2 to 3 tablespoons zero-sugar sweetener such as Erythritol, monk fruit sweetener, or xylitol or a few drops of liquid Stevia to make these a completely sugar-free ball for a ketogenic diet. If you aren't on a ketogenic diet, you can increase the amount of pure maple syrup to up to 5 tablespoons for a sweeter ball. |
Prep Time |
Cook Time |
Total Time |
Category: Dessert |
Ingredients:
For Coating:
Chocolate filling ingredients:
|
STEP 1Preheat oven to 400 degrees. Place two baking sheets on top of each other to bake the churros. This protects your delicate pastry. Line parchment; set aside.STEP 2In a medium saucepan, add water, brown sugar, salt, and butter. Place over medium-high heat. Heat until butter is melted and mixture starts to simmer. As soon as it is simmering, whisk in the flour. Whisk until there are no flour lumps and a dough ball has formed.STEP 3Now, using a wooden spoon you want to stir the dough around your pot and cook it for about a minute over LOW heat. The mixture will clump and pull away from the sides of the pan. Just do it for a minute, then take it off the heat and set aside.STEP 4In a jug, combine eggs and vanilla and whisk together.STEP 5Now, using a wooden spoon, incorporate a little of your egg mixture into the dough. Stir and mash, breaking up the dough until loosened. Stir well until eggs are incorporated and mixture has the appearance of mashed potatoes. Continue adding egg mixture until completely combined.STEP 6Transfer your dough to a piping bag fitted with a star nozzle then pipe the dough into long churros on the parchment-covered pans. Make sure to pipe them nice and thick. Do this by putting pressure on the bag and piping slowly. Leave about 2 inches of space between each churro.STEP 7Bake for around 18-22 minutes or until golden brown. THEN turn off the oven and leave the churros in the oven for 10 minutes to dry. This step allows the churros to maintain their shape and not go flat once they cool.STEP 8Combine sugar, cinnamon and salt in a ziplock baggie.STEP 9Take the churros straight from the oven and toss them in the sugar, cinnamon, and salt mixture. Roll the churros in the mixture until well covered. It is best to do this when the churros are warm and fresh from the oven.STEP 10Make a thicker chocolate sauce using 16oz of our 60% chocolate chips (with 100ml of water/milk) and insert into a pastry syringe to then fill cooled off churros full of chocolate. Enjoy your homemade churros with our decadent and thick hot chocolate |
Variations & Tips*Add Vanilla into Step 10 to change taste profile of chocolate. *The higher the cacao % used in the pudding like the 100% cacao, the thicker the pudding so choose a bar that's low on the sugar, but higher in real chocolate. *If you want an unsweetened sugar version, try our paleo blends and add maple syrup or even honey. *If you want it thicker, use oat mylk. Filtered water works well too! *Make sure to crumble up the bar of chocolate for faster cooking time otherwise we have our cacao powder or chocolate chunks. These make the process of melting and measurement easier. |
As the fire snaps, crackles and pops the wood’s aroma envelopes the surrounding area. Sitting around a campfire has become ubiquitous since the invention of fire. It provides warmth, light, and fuel source. Plus, you can roast marshmallows! Here we will break down the best roasting methods, which marshmallows are best to use, a classic s’mores recipe, and tips and tricks to make your s’mores leaving you wanting more.
Prep Time |
Cook Time |
Total Time |
Recipe Yield |
Category: Dessert |
Ingredients:
|
STEP 1Form a heat source, from campfire, to barbeque grill, to food grade Sterno. STEP 2Halve your graham cracker sheets so you have 2 equal portions to create a top and bottom to your s’more. STEP 3Place a piece of chocolate on each graham cracker. STEP 4Poke marshmallow with skewer or stick and bring within an inch or two from your heat source and let toast while turning occasionally until it becomes puffed up and golden brown. STEP 5Grab your graham cracker and place your toasted marshmallow on top while grabbing other graham cracker to top. While squeezing crackers together, pull skewer away. STEP 6 Enjoy while still gooey, melty and warm!
If building your own fire is too much, make sure to get to ChocoVivo this summer for Make Your Own S’mores at your table. |
Variations & Tips*Play with different types of graham crackers, such as a cinnamon sugar graham cracker with a higher percentage chocolate to perfectly balance sweet, bitter, earthy and healthy-ish S’mores! *Try out different types of chocolate like our Coffee + Vanilla bar or Mayan Tradition bar for taste of a Mocha or a taste of Mexican Chocolate! *If you want less sugar in your S'mores, try our paleo blends. *Use or make a longer stick for the marshmallow to stay further from the fire source and thus staying cooler. *Use a multi prong skewer to roast multiple marshmallows at once. *Stuff your chocolate into the marshmallow before toasting to ensure a melted piece of chocolate in your S’more. *How toasted should the marshmallow be? This is a subjective answer. Some people will like a charred super gooey, or charred on outside cold on inside, or for the super patient keeping it far away from the flame and letting the whole mallow get melty and gooey. You are the master of your S’mores. * Which is the best variety of Marshmallows to use? As we mentioned the popularity of marshmallows in hot chocolate, those tend to be small bite sized marshmallows, tiny. The ones you want to use are large marshmallows which usually will be described for S’mores. See chart below.
|
The ChocoVivo Cacao Tonic combines the sparkle of carbonated and mineral water with the smoothness of chocolate, creating a pop that sits on your tongue in subdued jubilation. Great as a refreshing, healthy and cold, quick drink, our Tonics are great for those sunny summer days, and even the cool fog of the fall.
1 minute
3 minutes
4 minutes
1 Servings
Beverage
Vegan
Tonic, Chocolate
Ingredients:
|
DirectionsStep 1Place filtered flat water and choice of ChocoVivo chocolate into metal pitcher or small bowl over double broiler for two to three minutes or until hot enough to melt the chocolate. Step 2Whisk the water and chocolate to properly blend the two. Check for unincorporated chocolate by scooping from bottom of pitcher with long handled spoon. Whisk again to ensure all chocolate is fully incorporated and no chunks are left behind. Step 3Fill 12-14oz glass half-way with ice (Approx 1 Cup) Step 4Pour half of the carbonated liquid of choice over the ice. Should fill the glass about 1/4 to 1/2 way. Step 5Pour the whisked chocolate mixture through a fine mesh strainer over the ice and carbonated water. Stir the chocolate mixture to aid the liquid chocolate in passing through the strainer. Step 6Stir to incorporate chocolate mixture and carbonated water. Slowly pour the remaining carbonated water on top to create a luscious foam. |
*Use the Coffee + Vanilla bar or Mayan Tradition bar for taste of a Mocha or a taste of Mexican Chocolate!
*If you want an unsweetened sugar version, try our paleo blends and add maple syrup or even honey.
*If you want it thicker, use oat mylk.
*Make sure to crumble up the bar of chocolate for faster cooking time otherwise we have our cacao powder that makes the process easier.
*Need a little more Caffeine? Try our Mocha Tonic. Just add a shot or two of Espresso right after the chocolate mixture and top with the rest of your carbonated water.
]]>
Literally translated to “drowned” in Italian, the Affogato is a master art of delicious simplicity. Being a staple of Italian culture since ancient Rome, ice cream, the base of the Affogato, has become an artisan dish. With the introduction of chocolate to Europe in the early 17th century, it was only a matter of time until the two were combined into a delicious medley. A simple espresso shot poured over freshly scooped gelato or Ice cream and immediately consumed for a fresh and energizing taste, its ease of preparation contributes to an ultimately rewarding experience. The exact origin of this combination is not known, but one can only assume with the advent of the espresso shot in italy, came along with it the idea to combine it with gelato, another great idea from the artisans of Italy.
The Chocogato
The Chocogato is one large scoop of ice cream with ChocoVivo Sipping Chocolate poured on top in lue of the traditional espresso shot. Initially invented in 2013 by ChocoVivo’s founder when looking for the perfect way to enjoy the hot lick of the sun along with a creamy and smooth chocolate experience. The ChocoVivo Chocogato is more than just chocolate ice cream or chocolate sauce on ice cream. It is a fusion of sultry nutrient-filled chocolate, with the cool embrace of ice cream to create an inner breeze on a hot day. While still maintaining the simplicity and spirit of the Italian Affogato, the Chocogato removes the hustle and bustle of the espresso shot, and adds the beautiful essence of nutrient-rich ChocoVivo chocolate.
Prep Time |
Cook Time |
Total Time |
Recipe Yield |
Category: Beverage, Dessert |
Ingredients:
|
STEP 1Place Liquid Base and choice of chocolate into metal pitcher or small bowl over double broiler for two to three minutes or until desired temperature is reached. Hot drinks are typically served between 160F and 185 F. STEP 2Whisk the liquid base and chocolate to properly blend the two until evenly incorporated. STEP 3Check for unincorporated chocolate by skimming the bottom of pitcher with a long handled spoon. Whisk again to ensure all chocolate is fully incorporated and no chunks are left behind. STEP 4Pour the whisked chocolate through the strainer into your cup of choice. Stir the mixture to aid the liquid chocolate in passing through the strainer. STEP 5Prepare one large scoop of ice cream in a large enough mug or cup to fit both the ice cream scoop and the sipping chocolate. STEP 6Keep the sipping chocolate and ice cream separate until ready for eating, as to preserve the individual temperatures of both. Keeping the sipping Chocolate in one cup or glass good for pouring and one cup large enough for both the ice cream and the sipping chocolate to fuse. STEP 7When ready to serve, pour the sipping chocolate above the ice cream. STEP 8Top your ice cream with some crushed Cacao Nibs for crunchiness.
Enjoy! |
Variations & Tips*Use the Coffee + Vanilla bar or Mayan Tradition bar for taste of a Mocha or a taste of Mexican Chocolate! *Make it Vegan by using a non-dairy ice cream and a milk alternative. *A simple and elegant dish for a dinner party, summer picnic, or large gathering because it’s easy to prepare in large batches. *The higher the cacao % used in the Sipping Chocolate, like 100% Cacao, the thicker the Sipping Chocolate will be. Add more or less Liquid Base to establish your perfect consistency! *If you want an unsweetened sugar version add maple syrup or even honey. *If you want it thicker, use oat mylk. *Make sure to crumble up the bar of chocolate for faster cooking time otherwise we have our cacao powder that make the process easier. *Using slightly less liquid than prescribed above, this recipe can be used as a Dipping Chocolate for churros, cookies, fruit, marshmallows, popcorn, as a side dish to virtually any pastry, or try it drizzled over a slice of cake or our Fudge Brownies. |
]]>
Less of a contemporary hot chocolate and more of a melted drinkable chocolate bar. The ChocoVivo Sipping Chocolate provides a meditative and relaxing experience providing energy for the day, or relaxation for the night.
Using ChocoVivo’s less processed, non-conched, non-tempered, and vegan house-made chocolate, this drink becomes a savory and healthy delicacy.
By using cacao instead of cocoa powder the chocolate is not stripped its valuable nutrients, leaving for a more rich experience.
After venturing/pillaging through the Americas, and discovering the nectar of Native American revelment, Spanish voyagers brought back chocolate. Instantly becoming a staple in many European countries and a delicacy to royalty, chocolate began to be served as a more expensive drink to be consumed by society’s most elite.
Eventually adding sugar and milk to reduce the bitterness and highlight the sweet aspects of chocolate we are more familiar with today, chocolate-dedicated shops began to appear throughout Europe and have continued to flourish for hundreds of years.
Prep Time: |
Cook Time: |
Total Time: |
Recipe Yield: |
Category: Beverage |
Ingredients:
|
STEP 1
Place your liquid base and choice of chocolate into a metal pitcher or small bowl over a double broiler for two to three minutes or until desired temperature is reached. Hot drinks are typically served at between 160 degrees F and 185 degrees F. STEP 2Drop in your 65 grams of chocolate into the hot liquid, and whisk together to properly blend the two. STEP 3Check for unincorporated chocolate by taking a long handled spoon and feeling the bottom of the pitcher. Whisk again to ensure chocolate is fully incorporated and no chunks are left behind. STEP 4Pour the whisked chocolate through a small strainer into your cup of choice. Stir the mixture to aid the liquid chocolate in passing through the strainer to ensure a thick, smooth and creamy drink. Relax and Enjoy! |
Variations & Tips
|
With our 220mg Full Spectrum Cacao CBD Tincture, some chocolate, your favorite milk and a little time, you can make it at home.
Prep Time |
Cook Time |
Total Time |
Recipe Yield |
Category: Beverage |
Ingredients:
|
STEP 1 Place Liquid Base and choice of chocolate into metal pitcher or small bowl over double broiler for two to three minutes or until desired temperature is reached. Hot drinks are typically served between 160F and 185 F. STEP 2 Whisk the liquid base and chocolate to properly blend the two until evenly incorporated. STEP 3 Measure 1 dropper full (~10mg CBD) of ChocoVivo Cacao CBD tincture and stir into the hot chocolate. STEP 4 Whisk to incorporate STEP 5 Sit back and enjoy! :) |
|||
220mg Full Spectrum Cacao CBD tinctures available in-store only. Two flavors: Cacao and Cacao Mint
]]>Prep Time
1 minute
Cook Time
14 minutes
Total Time
15 minutes
Category: Dessert
Cuisine: Vegan
Keywords: Mint, Chocolate
Ingredients:
Optional: Whipped Cream
|
STEP 1Crumble the chocolate and pour the hazelnut mylk in a small pot on top of the stove. Turn heat to low/medium and wait until it's a low simmer. STEP 2Once simmering, give it a good whisk for about 2 to 3 minutes. Chocolate and hazelnut mylk should be well blended without speckles. Be careful not to let mixture boil. STEP 3Pour custard-like mixture in a small cup and put it into the refrigerator for about 1 hour. Sprinkle with cacao nibs. Whipped Cream ToppingSTEP 4Combine dairy-free alternative cream and vanilla extract in bowl and blend on high for about 5 to 8 minutes or until light and fluffy. If whisking by hand, may take longer but hey, it doubles as a workout! Store the rest in a airtight container for up to a week. Place them on top of fresh strawberries/fruits, pancakes, or sneak a spoonful when no one is watching. |
Variations & Tips*Use the Coffee + Vanilla bar or Mayan Tradition bar for taste of a Mocha or a taste of Mexican Chocolate! *The higher the cacao % used in the pudding like the 100% cacao, the thicker the pudding so choose a bar that's low on the sugar, but higher in real chocolate. *If you want an unsweetened sugar version, try our paleo blends and add maple syrup or even honey. *If you want it thicker, use oat mylk. Filtered water works well too! *Make sure to crumble up the bar of chocolate for faster cooking time otherwise we have our cacao powder or chocolate chunks that makes the process easier. *You can use any other chocolate, but if you cannot get it to set, add a little thickener like cornstarch. That's the secret to the spoon standing up in the famous place in France! |
Prep Time |
Cook Time |
Total Time |
Recipe Yield |
Category: Beverage |
Ingredients:
|
STEP 1Place Liquid Base and choice of chocolate into metal pitcher or small bowl over double broiler for two to three minutes or until desired temperature is reached. Hot drinks are typically served between 160F and 185 F. STEP 2Whisk the liquid base and chocolate to properly blend the two until evenly incorporated. STEP 3Place the 3 grams matcha powder into a small glass and add a small amount of hot water. Use a bamboo matcha whisk and whisk to dissolve powder with water. STEP 4Add your whisked Matcha to your hot chocolate. STEP 5Check for unincorporated chocolate by skimming the bottom of pitcher with a long handled spoon. Whisk again to ensure all chocolate and matcha is fully incorporated and no chunks are left behind. STEP 6Pour out into a mug and enjoy! |
The chocolate used in our recipe are the bars of chocolate that we make and sell such as the Mayan Tradition which is the most popular hot chocolate on our menu. Our next most popular is a 75% which we call Middle of the Road. It's not necessary to use powder, but it's convenient. You can always take the bars and grind it up in a blender and put it in an airtight container so you can use it whenever you'd like. Otherwise we do sell chocolate powder here.
Taste and consistency will differ because of the following reasons: Our beans are specially fermented for our bars; We use a 2 – 3 day fermentation process at the farm; We also start with an artisanal grade of beans - think Farmers Market fruit from a small grower, instead of a large commodity grower where it’s a monocrop and the soil is not being replenished and taken care of; And last, but not least, we stone grind the chocolate to create just the right texture so that you get enough cacao butter released when the chocolate is melted, but you also have some texture which you can see specks of nibs after you finish the cup of chocolate.
So see the secret below to making a cup of hot chocolate. Steps are easy, but the type of chocolate does make a difference!
Prep Time |
Cook Time |
Total Time |
Recipe Yield |
Category: Beverage |
Ingredients: · 50 g (1.767 oz) of ChocoVivo chocolate bars – Mayan Tradition or 75% Chocolate are our best sellers. · 250 ML (8.5 oz) of milk, hazelnut milk, hemp milk, or even water – like the Mayans did! |
STEP 1 Heat up your Milk on low heat in a small sauce pan up to about 120 F for about 5 minutes. STEP 2 Take it off the stove and add in broken up pieces of the chocolate. STEP 3 Whisk it up vigorously for about 30 – 45 seconds. We use a double balloon whisk at the shop particularly the Swiss brand Kuhn Rikon. They work the best to create foam and emulsify the chocolate with the milk. STEP 4 Put the pot of chocolate back on the stove over low heat if you still see specks of chocolate and gently stir it for a few seconds. STEP 5 Take the pot off the stove and give it another good whisk. Color is a good indicator of how well your chocolate has melted. You should not see too many specks. If it's a light chocolate brown color, it needs to be whisked more unless you intentionally added less chocolate! The final color should be a nice medium chocolaty brown color. |
On our secret menu we have a Matcha Hot Chocolate where we whisk Matcha and add in a 75% Cacao! See the last image below! Feel free to experiment and do what you think is going to make the best cup of hot chocolate! Then come into the shop and compare and contrast!
Prep Time |
Cook Time |
Total Time |
Recipe Yield |
Category: Dessert |
Ingredients:
|
STEP 1 Preheat oven to 350 degrees. Butter a 9-inch square baking pan or dish. Line bottom of pan with parchment paper; butter lining. STEP 2 Melt chocolate and butter in a heatproof bowl set over a pan of simmering water, stirring occasionally until smooth. STEP 3 Whisk together flour, baking powder, and salt in a large bowl; set aside. Put sugar, eggs, and vanilla in the bowl of an electric mixer fitted with the paddle attachment; beat until fluffy and well combined, 3 to 5 minutes. Add in flour mixture and beat until well combined. STEP 4 Divide batter between two medium bowls (about 2 cups per bowl). Stir chocolate mixture into one bowl. In other bowl, stir in pumpkin, oil, cinnamon, and nutmeg. Transfer half of chocolate batter to prepared pan smoothing top with a rubber spatula. Top with half of pumpkin batter. Repeat to make one more chocolate layer and one more pumpkin layer. Work quickly so batters don't set. STEP 5 With a small spatula or a table knife, gently swirl the two batters to create a marbled effect. STEP 6 Bake until set, 40 to 45 minutes. Let cool in pan on a wire rack. Cut into 16 squares. Enjoy! |
Notes: adapted from Martha Stewart October 2004 Magazine
Prep Time |
Chill Time |
Recipe Yield |
Category: Dessert |
|
Ingredients:
|
STEP 1 Place chocolate into metal pitcher or small bowl over double broiler for one to two minutes, stirring every 10 seconds. STEP 2 Place egg yolks and 1/2 cup sugar in a medium bowl and whisk until pale yellow. Whisk in the olive oil, coffee, zest and salt. Add the melted chocolate and whisk until smooth. Set aside. STEP 3 Beat the egg whites in a bowl until soft white peaks form. Gradually sprinkle the remaining 1/4 cup sugar and beat just until peaks are formed. STEP 4 Add a generous spoonful of the egg white mixture to the chocolate mixture. Fold in until completely incorporated. Pour the chocolate mixture into the bowl of egg whites. Gently fold until combined. STEP 5 Divide mousse into six ounce ramekins and cover with plastic. Refrigerate over-night. STEP 6 Uncover and enjoy! :) |
Prep Time |
Cook Time |
Total Time |
Category: Dessert |
Ingredients:
|
STEP 1Preheat oven to 325 degrees STEP 2Beat eggs and combine with almond butter, vanilla extract. Mix well STEP 3In Separate bowl, mix 4 oz Mayan Tradition Chocolate and ½ C of coconut sugar, add baking soda and combine both bowls STEP 4Bake for 10 min in a square pan. |
Variations & Tips
*The higher the cacao % used in the pudding like the 100% cacao, the thicker the pudding so choose a bar that's low on the sugar, but higher in real chocolate. *If you want an unsweetened sugar version, try our paleo blends and add maple syrup or even honey. * If you don't like spicy, use the Coffee + Vanilla bar for a Mocha like taste. *Make sure to crumble up the bar of chocolate for faster cooking time otherwise we have our cacao powder or chocolate chunks that makes the process easier. *You can use any other chocolate, but if you cannot get it to set, add a little thickener like cornstarch. That's the secret to the spoon standing up in the famous place in France! |
After using many different masks, we decided to try our own with ChocoVivo cacao powder . The recipe is super easy, check it out below!
ChocoVivo Cacao Face Mask
Prep Time |
Cook Time |
Total Time |
Recipe Yield |
|
Ingredients:
|
STEP 1 Mix cacao powder, clay, and oil together in a medium sized bowl. STEP 2 Slowly incorporate the green tea until consistency of mixture is thick and fluffy. STEP 3 Apply a thick layer to your face and let sit for 10-15 minutes. STEP 4 Rise off with warm water and an old towel, as product may stain STEP 5 Follow up with your favorite face oil, we love our Rose Cacao Oil. |
|||
For those interested in knowing more about the benefits of cacao, here is a well-written article we approve of written by Dr. Merry an M.D, Ph.D, article on cacao.
Prep Time |
Cook Time |
Total Time |
Recipe Yield |
|
Ingredients:
*Top with your favorite nuts, cacao nibs, or fruit for added texture |
STEP 1Carefully melt chocolate in a double boiler until smooth. Use less milk or milk substitute for a thicker mousse. Use sweetener of choice to taste. Note that the chocolate will already be sweet. STEP 2Combine ingredients in a blender or food processor until completely smooth. |
|||
Variations & Tips*Use the Coffee + Vanilla bar or Mayan Tradition bar for taste of a Mocha or a taste of Mexican Chocolate! *The higher the cacao % used in the pudding like the 100% cacao, the thicker the pudding so choose a bar that's low on the sugar, but higher in real chocolate. *If you want an unsweetened sugar version, try our paleo blends and add maple syrup or even honey. *If you want it thicker, use oat mylk. Filtered water works well too! *Make sure to crumble up the bar of chocolate for faster cooking time otherwise we have our cacao powder or chocolate chunks that makes the process easier. |
Prep Time |
Chill Time |
Total Time |
Recipe Yield |
Category: Dessert |
Ingredients:
|
STEP 1Brush an 8½x4½" loaf pan with oil; line with parchment paper, leaving an overhang on long sides. Pulse cacao nibs in a food processor to a fine powder; transfer to a bowl. STEP 2Place dates in a small heatproof bowl; pour boiling water over to submerge. Cover with plastic wrap; let sit until softened, 8–10 minutes. STEP 3Drain dates and transfer to food processor. Add nut butter and remaining 1 Tbsp. oil; process in long pulses until dates disintegrate and ingredients come together (mixture will be crumbly). Add seeds, kosher salt, and cinnamon; pulse to incorporate. Add almond flour, ground cacao nibs, and shredded coconut and pulse just to combine. Press into prepared pan in an even layer, compacting as firmly as possible (it will look slightly greasy, but oils will solidify once mixture is cold). Cover and chill until firm, about 1 hour. STEP 4Uncover and use sides of parchment paper to lift bar out of pan. Cut into a 6x3 grid to form squares; sprinkle with sea salt. |
*Energy bites can be made 5 days ahead. Cover and chill, or freeze up to 2 weeks.
*Recipe and Photo Courtesy of Bon Appetit May 2017
~ChocoVivo Thai Sauce Recipe~
]]>Chocolate doesn’t always have to be sweet. In fact, the earliest versions of drinking chocolate were far from it, and used for more of a medicinal, energizing purpose. Holding true to its original uses, at ChocoVivo we incorporate chocolate in ways everyone can enjoy, as fuel not just candy.
Some may be turned off by the idea of 100% cacao. But, you’d be surprised by how luscious, rich, and smooth it can be when combined with hazelnut butter. Calling all who subscribe to that sugar-free, paleo, whole 30 lifestyle! Meet Unsweetened Hazelnut Cacao Butter, your new best friend.
Our unsweetened butters are a combo of raw cacao nibs and high quality nuts. Add a little dash of sea salt, grind together and you’ve got the best complement for fruit, a rice cake, or something warm and savory. Hazelnut butter is a classic, but we also play with seasonal flavors such as Unsweetened Salted Pecan Butter, and Unsweetened Black Sesame.
Our team has been experimenting lately with curries, sauces, and dishes that incorporate nut butters. If you are a fan of Thai peanut sauce, here is our chocolate variation!
Prep Time |
Cook Time |
Recipe Yield |
Category: Sauce |
|
Ingredients: · 1 1-inch piece of ginger · 1 small garlic clove · ½ cup unsweetened hazelnut butter · 2 tablespoons of reduced sodium soy sauce · 1 tablespoon of lime juice · 1 teaspoon of brown sugar (optional and can be subbed) · crushed red pepper flakes to taste
|
STEP 1 Blend all ingredients together STEP 2 Add water to adjust thickness to liking STEP 3 Use as a salad dressing, in curry, or in stir fry. Store and refrigerate any leftovers.
|
Sub any of your favorite recipes that call for nut butters, and let us know how it goes. If you’ve got a recipe you’d like to share please send us an e-mail and we’ve love to feature it!
]]>